Showing posts with label Sunday Brunch. Show all posts

16 September 2011

Sunday Brunch

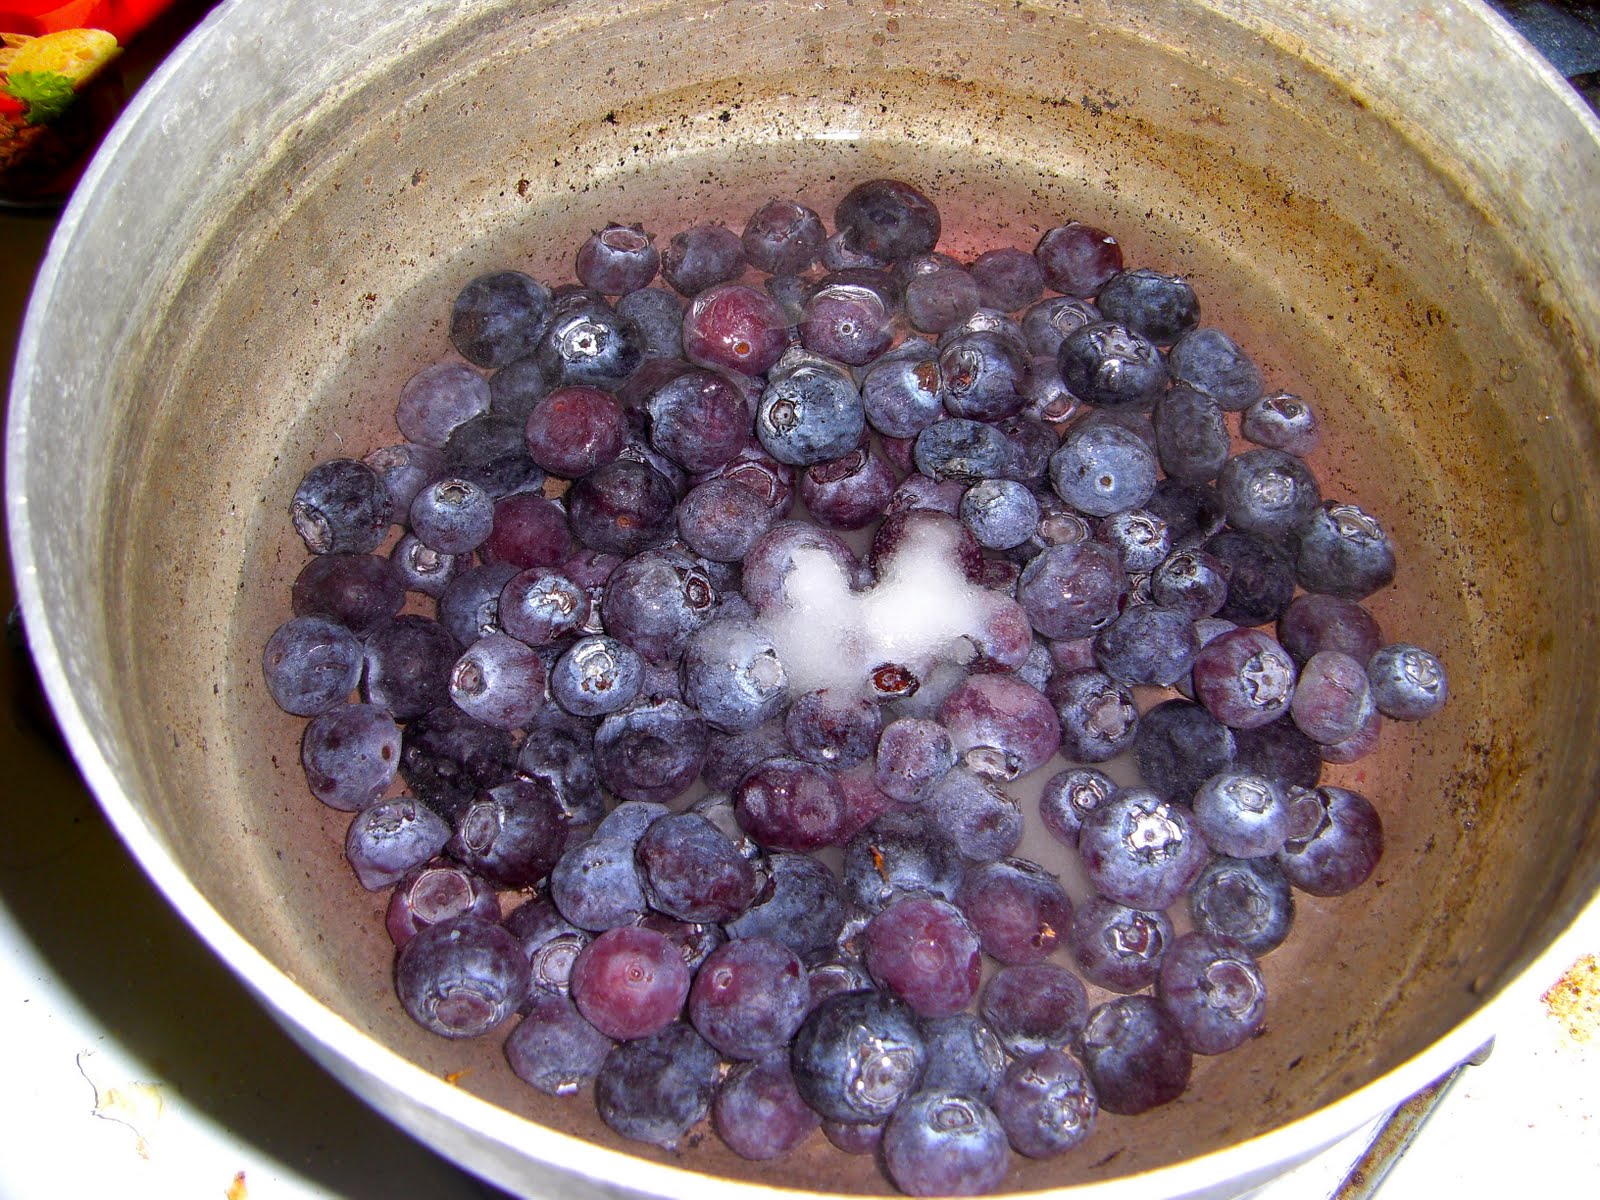
The other day I was looking through the freezer trying to free up some tupperware & I came across some blueberries I had frozen last year. I think they were supposed to be used in smoothies, but since we rarely have milk I don't drink smoothies very often. After thinking for a minute on what I could use them in, I decided to make a blueberry sauce. I've made cranberry sauce for holidays so I figured it couldn't be very difficult.

So I pulled them out of the freezer & left them to defrost for a couple hours.


I added enough water to cover the berries. Then the sugar. I used probably about 2 Tbsp.


Then I brought it to a boil.


Stirring often.


The blueberries didn't pop open like cranberries do so I mushed them up a bit & kept them boiling until it reduced down to a yummy looking sauce.


We ate it over ice cream and it was absolutely delicious!

04 September 2011

Sunday Brunch

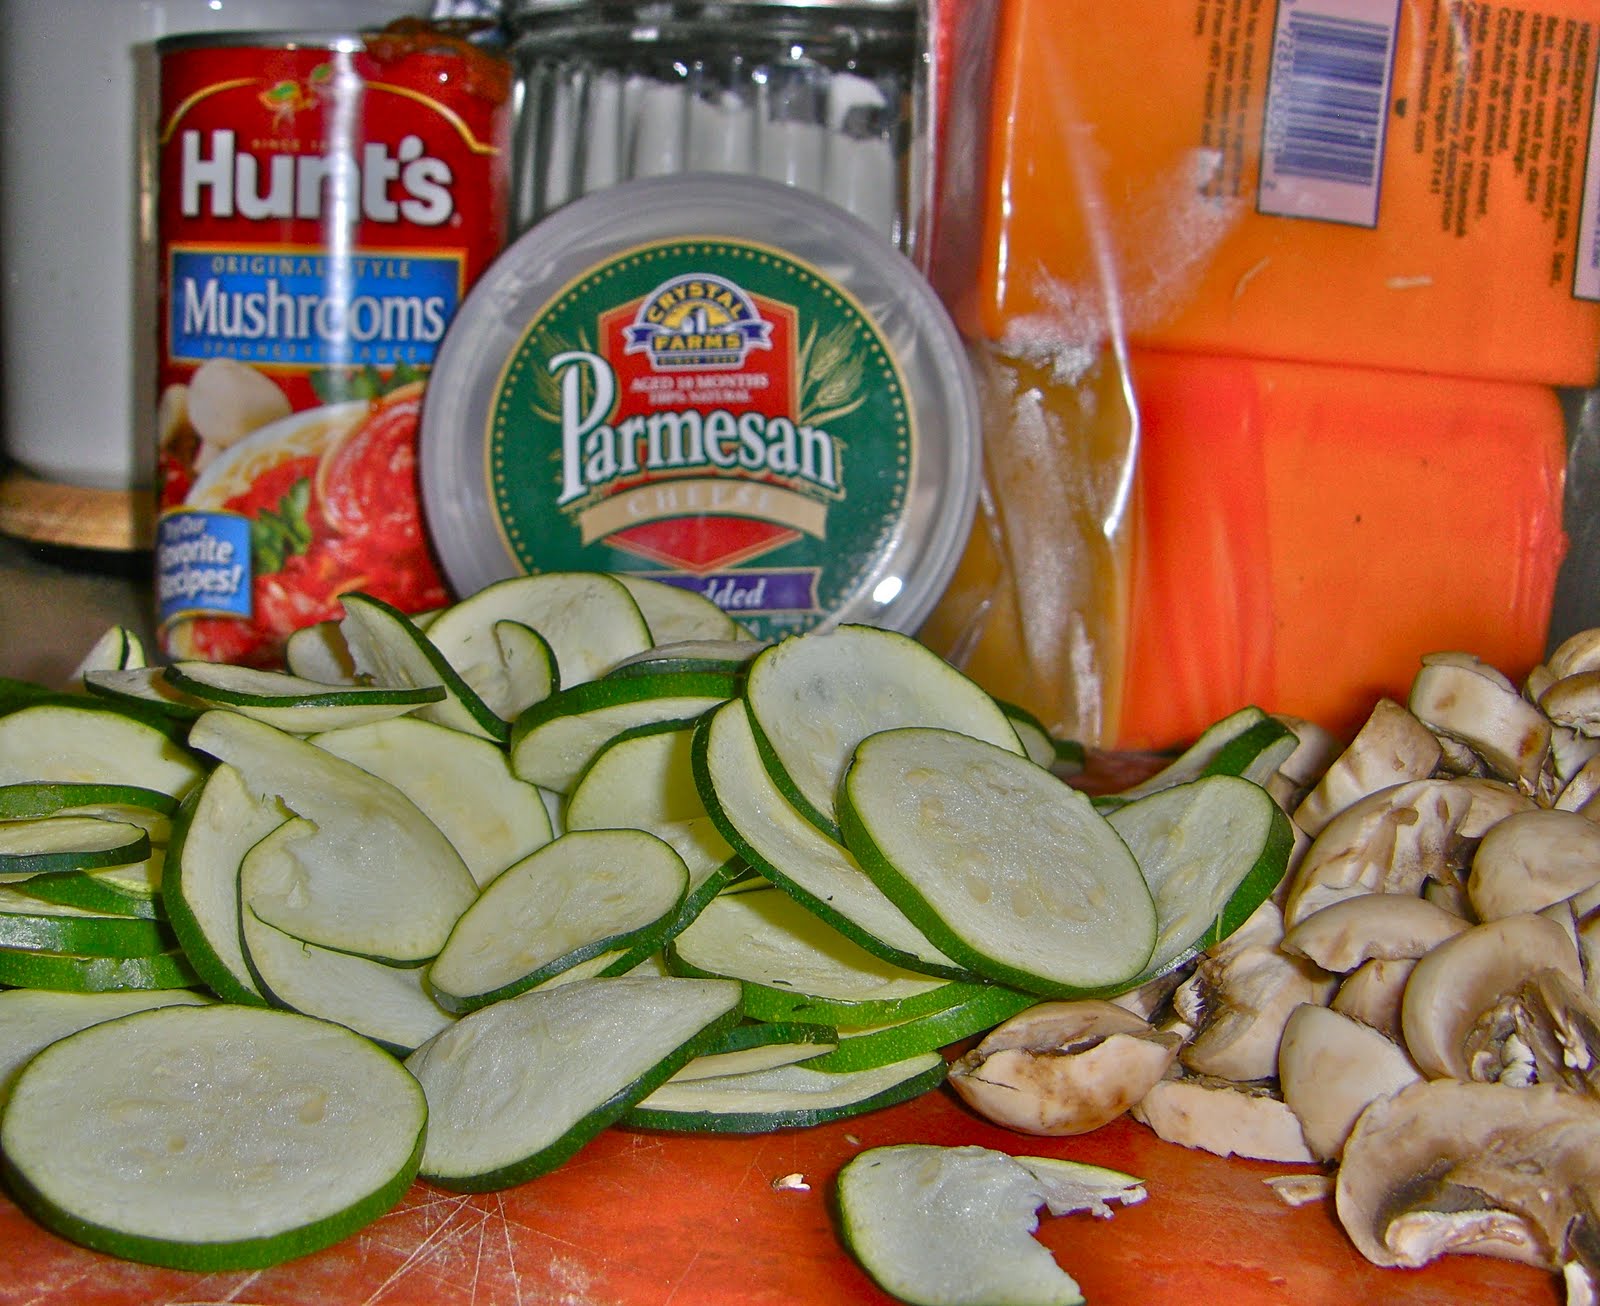
The other day I was searching through the fridge looking for inspiration for a side dish to go with our hamburgers that Jake was grilling up. I found sliced zucchini, a baggie of mushrooms, & lots of cheese. I thought an Italian style veggie casserole would be good. So I started gathering ingredients & here's what I came up with.

Italian-style Veggie Bake


What you need:
*1-2 (depending on size) thinly sliced zucchini, spread out & dried on paper towels for at least 20 minutes.
*Approx. 1 pint of mushrooms, sliced; I had not dried these on a paper towel, but I would definitely recommend it. Drying the veggies helps them soak in the flavor of the sauce when it's cooking.
*Cheese; we use lots of cheese. Medium & sharp cheddar and parmesan are staples in our house. Other favorites are asiago, romano, blue, mozzarella & cotija. For this dish I used medium cheddar and parmesan
*1/3-1/2 of a large (16 oz?) jar of pasta sauce
*Casserole dish with cover

Pre-heat your oven to 425F.


Layer your ingredients. I put a thin layer of sauce in the bottom of the pan. Add zucchini, mushrooms, and other veggies you may like to add, more sauce, cheese. Repeat.


Looking good.


Cover & cook until the cheese is melted. Remove the cover and continue baking until the cheese gets that lovely browned color.

For this dish I baked it at about 425F for approx. 25 minutes, then baked it for another 10-15 minutes or so without the cover. I just keep an eye on things & when it looks done, it's done!

As you probably noticed, unless I'm using someone else's recipe I don't measure things out or time things. I'm trying to get better about it, but often times I just don't think about it.


Dish review: This is definitely a recipe to keep and make again & again. Even "Where's the Meat" Jake loved it! :)

I used 1/2 of the large can of pasta sauce. Next time I will probably only use about 1/3 because it was a little too "saucy" for my taste. I liked this because you can make it as complex or simple as you want. You can add olives, onions, peppers, basil, spices, artichokes, whatever your tastebuds are asking for.

If you happen to try this or any of my other Sunday Brunch recipes I'd love to hear how they work out for you. I hope everyone has a wonderful Sunday, we're off to the Devils Tower for a cowboy poetry/music gathering. :D


31 July 2011

Sunday Brunch

Several weeks ago Jake decided that he wanted Huevos Rancheros for our Sunday morning meal. I've never had it before so I Googled it to find a recipe. All the recipes I found were very intricate & took about 45 minutes to make. I decided if I was going to make it we would have to simplify.

Plus Jake always remembered it being served with chili, & none of the recipes I found included that.

Since then I have made it several times since then and it is always fabulous!


Here is our version of Huevos Rancheros.

Brown your corn tortillas in a small layer of olive oil.


Heat your favorite chili.


Fry your eggs to your preferred done-ness.


Gather your fixin's. Those green onions & cilantro came from my garden. Yum!


Layer your eggs on your tortilla(s), add chili, and other delicious goodies. I also had some spanish rice in the fridge that I had made a few days ago so I added that as well. Top with salsa.

Enjoy!!!


Add some crafty eye candy...

More sketchbooks for some of my favorite peeps. The book on the right, I cut the corners too close so I had to add the grey polka dots to finish covering the padding & board.


I've been thinking of a selling some of my books & jewelry for quite a while now and decided I needed a brand. I thought of many more detailed brands, but then I thought I'd go simple. Living in ranching communities for many years now have helped me appreciate the simpler things & I love the look of the cattle brands. I also thought this would be very easy to stitch up in many different ways.

My one concern is that someone is already using a similar brand. I searched online, but did not find anything. What do you think of my A Prairie Sunrise brand? Have you seen similar ones out there? Thanks so much for your help!

24 July 2011

Sunday Brunch

Today I'm going to share with you a "recipe" I created that is my version of a delicious meal I ate at Olive Garden a few months ago. I do not remember what is was called, but it's a fettuccine alfredo with balsamic steak so that's what I'm calling my recipe.*

Balsamic Steak Fettuccine Alfredo


Get your favorite cut of steak for grilling.


Spice it as you normally would. We use garlic powder, salt, pepper, and a little Lawry's seasoning. Then cover with a balsamic cream, like Emiliani Balsamic Cream. If you can't find a balsamic cream I'm sure balsamic vinegar would work just fine. Season both sides and grill.


While your steak is on the grill make your alfredo sauce. This is my go to recipe. Delicious! If you have not made sauces before it is very easy, thicken your sauce to a little thinner than you would like. The sauce will continue to thicken slightly once it has been taken off heat.


I like a little kick in my alfredo sauce so I added some cayenne and black pepper. I prefer white pepper because the black pepper looks like little bugs in the sauce, but we were out of white pepper and this is what we had.


Boil & drain your fettuccine noodles. Rinse with cold water to keep the noodles from sticking together. The alfredo sauce recipe I use is perfect for half a box (8 oz?) of noodles.


Pull your steak off the grill when it has reached your preferred done-ness.


Toss the sauce in with the noodles and reheat if your sauce sat for a few minutes.


Cut up your steak into bite size pieces. Add to the pasta. Drizzle with more balsamic cream & top with parmesan, or other italian cheeses.


Enjoy with a delicious salad!

We have made this meal twice now & both times it has come out so wonderful! If you try this recipe I'd love to hear how it goes for you. :)

*When I create my own recipes I do not measure. I use a little of this and a little of that. I taste often as I cook to make sure I have the right balance.

29 May 2011

Sunday Brunch

Sunday's in the Tuckey home are set aside for Sunday Brunch. Sundays are usually the only day that Jake has off. We either end up staying home, watching movies, & working on projects or we'll go out for a drive and explore the area.

Since today is a cold, windy, rainy day we decided to stay home, have a delicious breakfast, & watch Firefly.

Here's what we made:

Fried eggs. I don't like runny yolks so I break my yolk, but I do have the skill (usually) to not break the yolk for Jake's over-medium eggs. :)

Last night we had BBQ. We had so many fabulous appetizers that by the time we got to the steaks I was too full. Jake cut up the steak into bite sizes pieces for a delicious hash.

Next he got the potatoes ready. Peel the potatoes and "pre-bake" them in the microwave for a few minutes. (If you've never cooked potatoes in the microwave before be sure to stab the potatoes a few times with a fork before heating them, otherwise they'll explode.)

Throw the potatoes on the skillet, which has been preheated with plenty of olive oil. Brown the potatoes for several minutes.

Add the steak & continue to brown. We like our hash on the crispy side. Don't forget to add your favorite seasoning. I think he added garlic powder & pepper, and most likely some Lawry's season salt too.

While we were making the hash & eggs we also had some bacon baking in the oven. Serve up, drizzle with some Tapatio for a little kick, add some fruit, & enjoy!

Isn't teamwork great? :)


Jake's mom is visiting from California right now and yesterday we took her to Ft. Laramie, which was a military post and also a stopping point along the Oregon/Mormon/California Trail in the mid-1800s. It's a pretty amazing & historic national park that most don't know about. If you're ever in Eastern Wyoming it's definitely worth the $3 entrance fee!

I'll share more pictures later this week, but I thought you might like to see a picture of the decor of the bar. It has been restored, but this is an exact replica of how the bar looked in its day.

Isn't the wallpaper beautiful? The wife of the barkeep wanted the men to have a little culture.


08 May 2011

A Mother's Day Sunday Brunch

First off Happy Mother's Day to all! I hope everyone, mother or not, is having a wonderful day.

I've got a quick & easy recipe today. My dad used to make this all the time on nights when he was in charge of dinner.

Hot Dogs & Mashed Potatoes

Make your mashed potatoes.

Peel and boil the potatoes until you can stab through them easily. Drain and put in a mixing bowl. Smash the potatoes and add butter and milk. Mix. Add more butter or milk as needed. Add your favorite spices. I usually add garlic powder, but rosemary would be another delicious choice. While your making the potatoes be sure to preheat your oven (400).

Split your hot dogs and put on a baking sheet.

Put the hot dogs in the oven for a few minutes to lightly brown the outside.


Top with mashed potatoes and your favorite cheese. Bake until the cheese is melted.

Delicious and easy and great as leftovers! Enjoy!


24 April 2011

Sunday Brunch

Earlier this week I realized that I haven't posted a Sunday Brunch in several weeks. I'm starting to think I should have named these posts Sunday Dinner since I tend to cook more dinners than breakfasts, but that's neither here nor there. :)

Lately, I've been cooking with a lot of Mediterranean-style ingredients. More specifically olives and whatever else I have in the cupboard at the time.

Today I've got a Creamy Pesto Chicken Pasta to share with you. Enjoy!

Gather your ingredients.


As I've mentioned before, I don't measure or time my cooking (unless I'm baking or following someone else's recipe). For the sauce I use about a glass of milk and a couple spoonfuls of pesto. It varies depending on how pesto-y or creamy I want the sauce. You could also use cream or buttermilk for added creamy-ness.


Reduce milk & pesto to desired consistency. The sauce will continue to reduce a little after you have turned off the heat. I prefer a thicker sauce so I simmer it for about 30 minutes or so.


Chop onions and garlic.


Saute your main ingredients. I use a first press evoo for a more flavorful experience. (I refuse to use Canola oil anymore, someday I'll tell you my issues with that unnatural oil.)

Cook your chicken first, until it's mostly cooked through. Add onion and garlic and continue to saute until chicken is done. Add mushrooms and olives and whatever other ingredients you choose to use. A couple ideas would be artichoke hearts and roasted red peppers.


Add sauce to chicken mixture.


Stir sauce in and let simmer for a couple minutes longer.


Serve over noodles. Yum! Yum!

In other news, Jake & I drove down to Cheyenne and went roller skating yesterday. What an adventure that was! More on that tomorrow. :)

11 March 2011

CSN Product Review & Sunday Brunch

As I mentioned a few weeks ago, I was asked if I would like to review a product from CSN Stores. After taking some time to cruise their many online shops (and adding several items to my shopping cart for future reference) I remembered that I've had a wok on my wishlist for ages and ages.

I did some research on what makes a good wok and then entered my criteria. From there I chose the 14" Professional Carbon Steel 7-Piece Wok Set by Concept Housewares. During my research, I found that cast iron seems to make the best woks, but they are WAY out of my price range at this time. I wanted a wok that wasn't non-stick. I despise non-stick and love my cast iron pans. This wok does require a few layers of pre-seasoning before the first use and careful care and seasoning after each use. But since I use mostly cast iron cookware I'm used to this kind of care already.

I got my order very quickly and couldn't wait to use my wok, but I still had lots of unpacking to do so it took me a few days to actually make anything. I was a little disappointed when I pulled it out of the box because it seemed a bit flimsy, but I think that's the point of carbon steel, light yet sturdy. Because of the light weight I didn't even need to use the helper handle. I had made sure to order a wok with a helper handle because I wasn't sure how heavy it would be.

I had read some reviews on the website that this product was prone to rusting, but I also read a review warning people not to soak their wok, especially in soapy hot water. It needs to be treated like cast iron; no soap, scrub gently, and season with lots of oil. It will change colors with use. After just one use the bottom 1/3 is already getting a nice seasoning, I can't wait until the whole thing is well seasoned.

In my opinion, you can't review cookware properly without sharing a recipe and pictures. So here is what I made the other day...

Are any of you familiar with the Pioneer Woman's Tasty Kitchen? It's a great recipe sharing website where amateur and professional cooks alike share recipes and make new friends. I only use it occasionally, but if I'm looking for a new recipe I usually look there first. I found this recipe several months ago and it has become a regular on my menu, but there was a problem. I didn't have a large enough pan and I would always end up with half the stir fry on the stove top. This time, with the wok, I had plenty of room and didn't spill anything. :)

Cut and cook chicken. I used my only "non-stick" pan while I was pre-seasoning my wok.

Gather my ingredients.

After sauteing the onions and adding the chicken I pushed it to the side to scramble the eggs.

The rice was a little chunky from being in the fridge all day. I broke up the pieces and continued to mix ingredients. As you can see everything fit very well in the wok with room to stir and not make a mess.

Served with a Thai coconut soup. Yum! Yum!

My final thoughts: This wok is a great addition to my kitchen! It has a great price point and as long as I continue to treat it well I see it only getting better with age. I can't wait for many more stir frys and am interested to try the bamboo steamer rack and other accessories.

Thank you to Sean and CSN Stores for allowing me to review this product. I had fun and look forward to more reviews and hopefully some giveaways in the future!